The half-drop repeat is built in so it is easiest to create.
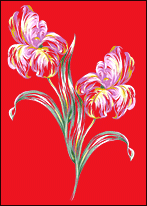
1 Open the file Iris2.psd that accompanies this tutorial or use your own motif.
In Iris2, the first thing to notice is that the motif sits in a separate layer above a uniformly colored layer. SymmetryShop creates a pattern in a transparent layer with no background content. This lets you choose another layer to serve as the background.
Notice, too, the position of the flowers in the lower-left part of the image. The flowers will be used as a seed for the future pattern and the position was chosen to leave plenty of room for the plug-in to work. You will want a similar positioning in all your SymmetryShop patterns.
2 Select your seed image. Ctrl-click (Windows) or Command-click (Mac OS) the layer's thumbnail in the Layers palette or use your favorite Photoshop selection tool.
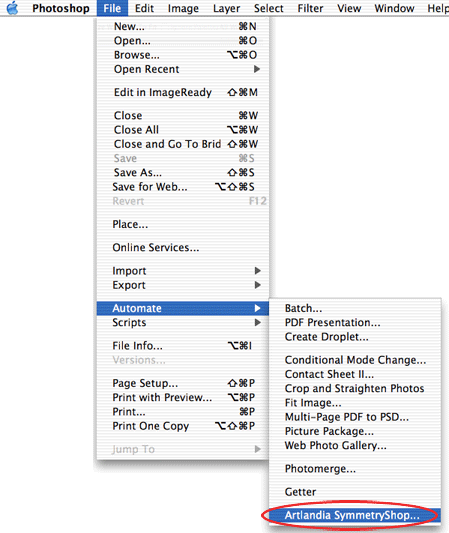
3 Launch SymmetryShop by choosing File > Automate > Artlandia SymmetryShop.... Note that SymmetryShop is not a filter and so it cannot be found in the Filter menu (where you typically find other plug-ins). Rather SymmetryShop is an automation plug-in and the File > Automate menu is the appropriate place to find it.
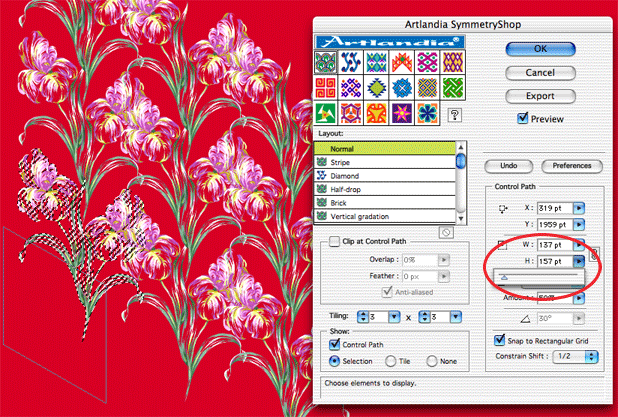
4 In the SymmetryShop palette, choose Half-drop in the Layout list and make sure that the Preview box is checked. SymmetryShop will then build your pattern immediately and rebuild automatically as you change settings.
Notice that by default SymmetryShop displays the pattern together with your selection and some auxiliary path (called the control path, see Step 6). You can choose to hide either or both of them and preview the pattern without the scaffolding.
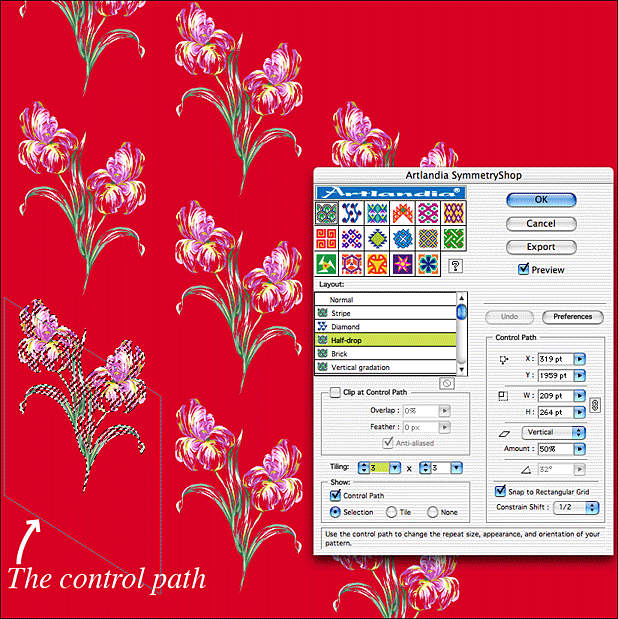
5 Your half-drop pattern is ready. Using the Tiling dials, set the tiling size 3 × 3 to make a sufficiently large pattern fragment and click Export. This adds your pattern to Photoshop presets and makes it available to the Paint Bucket and other pattern tools. You can save as many snapshots as you want as you go along.
At this point you can click OK to return to Photoshop or keep experimenting.
6 One thing to try is to modify the control path. The control path is a work path that SymmetryShop saves with your pattern to let you control the repeat size of your pattern. The control path also lets you rebuild the pattern at a later time (even without bringing up the SymmetryShop palette). Rectangle control paths produce full drops. Skewed ones (parallelograms) produce fractional-drop repeats.
By increasing or decreasing the height and width of the control path using the H and W sliders in the SymmetryShop palette, you bring elements farther apart or closer to each other and change the repeat size in the vertical and horizontal directions. For relatively small repeat sizes, flowers overlap and produce bouquets.
When you drag the sliders, SymmetryShop automatically readjusts the control path to preserve the chosen drop value (1/2). So the pattern always remains in the half-drop repeat.
7 Next, change the drop value to 1/3 in the Constrain Shift pop-up menu. As soon as you release the mouse button, SymmetryShop rebuilds your pattern.
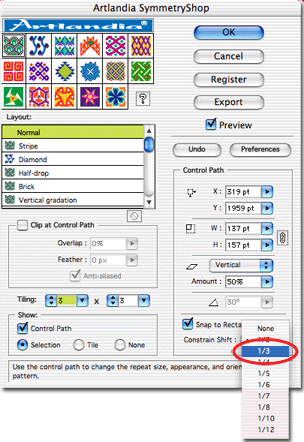
8 Notice that the skew amount has changed from 50% to 67%. This is because SymmetryShop automatically selects the closet value allowed for the selected drop value. You can also change the skew amount yourself. Again, you do not have to do any precise calculations. Move the slider in the direction you want and the plug-in snaps to the nearest suitable value. For the final pattern, reduce the skew amount to around 30% and SymmetryShop will make it 33%.
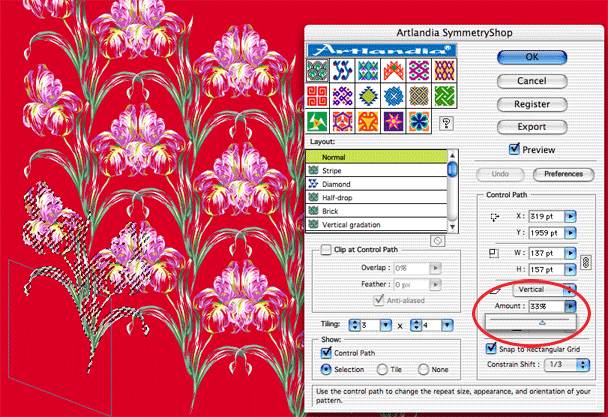
If you wish to try the full-drop pattern, reduce the skew amount to 0. To experiment with the brick-type repeats instead of the drop repeats, change the setting of the Skew Direction pop-up menu from Vertical to Horizontal. Restore the Vertical setting and the 33% skew amount when you are done.
9 Set the tiling size to 3 × 4 and click the Export button again. You need to make a bigger pattern fragment because the repeat size increases when the drop amount decreases. For the 1/3 drop, the pattern repeats every three columns (three drops of 1/3 each make one full drop).
10 Finally, click OK to return to Photoshop.
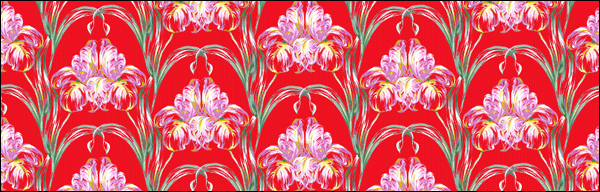
11 The exported pattern fills are now available to the Photoshop tools. For example, you can fill a rectangular area in a new file using the Paint Bucket tool and create a pattern that looks like the one at the bottom of this page.